Checkout our design and t-shirt process.
We wrote this page to show the homies our process. Keep reading to find out how we (and you) can bleach-dye a t-shirt.
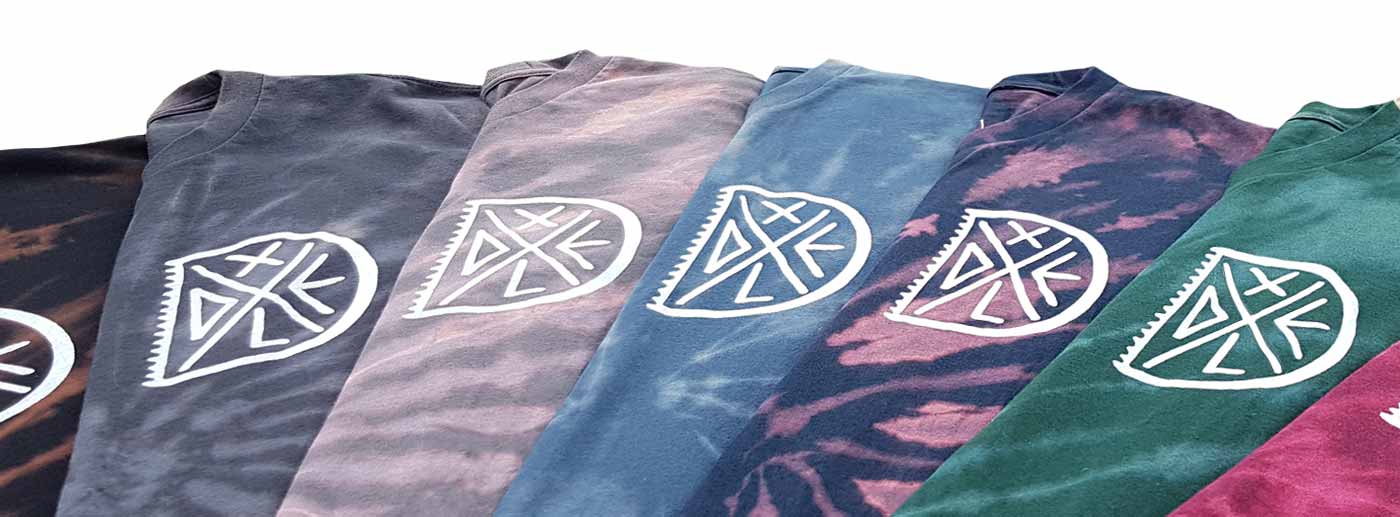
Slide the bar in the middle of the picture to see the the dye effect!
Tie-Dye vs Bleach-Dye?
Bleach-Dye is the process of removing dye from a garment with a diluted mix of bleach and water.
On this page, we will be showing you our bleach-dye process.
Tie-Dye is the process of adding dye to a garment.
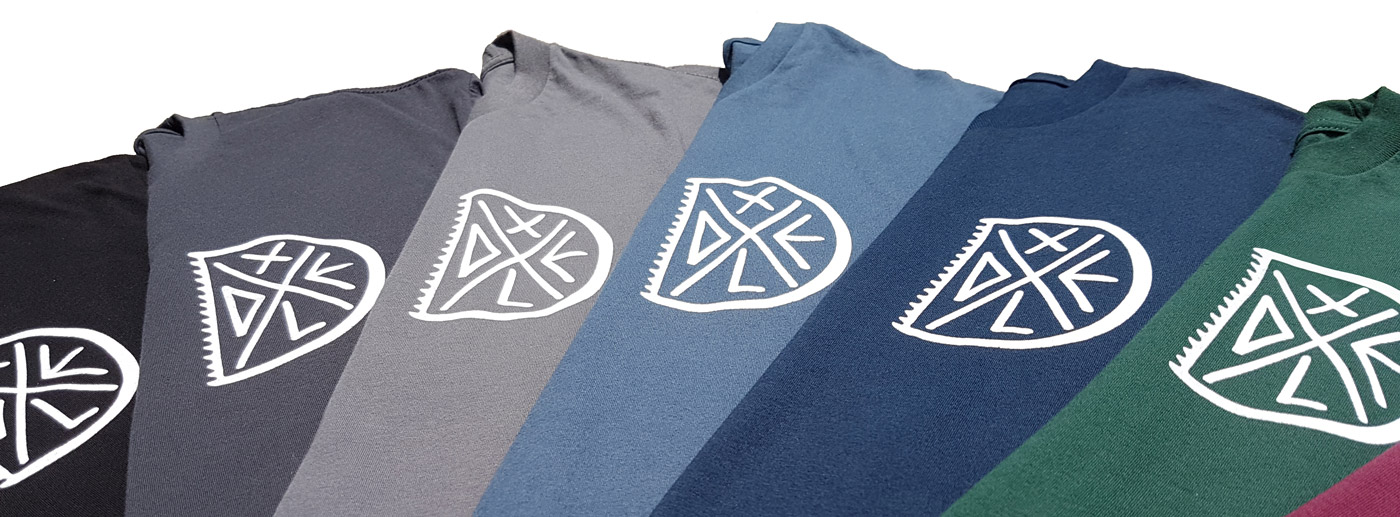
Non-Dye is just a good ol’ shirt with nothing special done to it, other than our dope graphics.

Checklist:
Grab all of these before you start:
- 100% Cotton Shirt(s)
- (3) Large rubber bands
- (2) Large bin of water
- Plastic table
- Bleach
- Water
- Squirt bottle (for bleach/water mix)
- Rubber gloves to protect the hands
- Bill Nye safety goggles to protect the eyez
- Kitchen Fork for twisting the shirt
- A space (like a bathroom)
- Washer & Dryer
** WARNING: BLEACH CAN BE A REAL B*TCH, IF YOU DO TRY THIS AT HOME BE SUPER CAREFUL **
Pre-Step: Setup
Environment Bleach-proofing: Remove every and anything from your environment that would suck if bleach got on to it. Bleach has a mind of it’s own sometimes.
Bleach-proofing yourself: Rubber gloves, safety googles and a crappy outfit you don’t care about. If you don’t have safety goggles, at least put stunner shades on.
Bleach/Water Mix: We have experimented with a bunch of ratios. We either do 1:3 or 1:4 (water:bleach). The stronger the solution the faster it will remove the dye, but the harsher it is to your shirt. Less is more when working with bleach.
Step 1: Soak the Shirt
Checklist Items: (1) large bin of water
We take the shirt(s), turn it inside-out and toss it into a (1) large bin filled with clean water. It’s extremely important the shirt is 100% wet, if it isn’t it will repel the bleach-dye. Make sure there are zero dry spots!
Step 2: Twisting & Tying
Checklist Items: plastic table, fork and (3) rubber bands.
Take the soaking wet shirt from step 1 and ring-it-out. The shirt needs to be damp, not dripping wet.
Spread the shirt on the plastic table, so it’s nice and flat.
Take the fork and place it directly in the center, or anywhere we’d like eye of the storm to be, and start twisting. When the shirt is in the shape of a circle we stop twisting.
Use (3) rubber bands to divide the shirt into 6 even sections; like 6 pizza slices or 6 pieces of blueberry pie or 6… ahhh you get it.

Step 3: Adding the Bleach Mix
Checklist Items: bleach, water and squirt bottle.
This part gets a little toxic. We think the fumes help our creativity. At least that’s what we tell ourselves.
With the shirt divided into 6 even sections.
We’re going to apply the bleach-mix to side (A), then flip the shirt over and apply to side (B).
Side (A): Apply the bleach-mix to three non-touching sections, then flip the shirt over.
Side (B): Apply the mix to the same 3 (already-bleached) sections.
Please don’t judge our drawing abilities when looking at the diagram below!

Step 4: Monitoring the Shirts
Checklist Items: (1) large bin filled with clean water *For small runs we use only 1 large bin.
Factors that affect the length of bleach time:
- Color of the fabric.
- Strength of the bleach mix.
- Lighting, if it’s being done under the sun or inside.
- Normal bleaching time is 12 – 26 minutes, we shoot for the shortest amount of time. Doing it under the sun will speed up the process.
Normally, during step 4 we hover over the shirts like a hawks to make sure everything is Kosher pickles.
When it looks good on our patented Dope-A-Meter we take the shirt, still twisted and tied, and move it into a large bin of clean water.
By doing this we’re diluting the bleach to a point where it’s no longer potent enough to dye the shirt. This gives us the ability to repeat the process and bleach-dye a bunch of shirts at a time.
Step 5: Wash & Dry
Checklist Items: (1) Washer & Dryer
Almost finished! All that’s left is an extra-long cold:cold wash-cycle. We use a little detergent to get the bleach the f*ck up out of there!!
Transfer the wash into the dryer. Start the dryer on a low tumble cycle.
If you purchase a tie-dye shirt from us it will not shrink anymore because of this step. Our non-tie-dye shirts do not go through a wash and dry cycle, so they will shrink a little. Gotta love that all natural 100% cotton!
Checkout our design and t-shirt process.
Comments or Questions: wegotchu@dxxdle.com

Pro-Tip: Caring for T-Shirts
These pro-tips apply to all graphic t-shirts, not just ours. We’re the t-shirt equivalents to sneaker-heads.
Washing:
- Flip t-shirts inside-out before tossing them into the washer.
- Set the washing machine to cold:cold, this will be less stressful to the t-shirt.
Dryer:
- We recommend never using a dryer, they suck the life out of t-shirts.
- It’s best to hang them to dry.
- If you do use a dryer, low tumble cycle.
Ironing:
- Never iron the graphic directly. It produces depressing results.
- If you’d like to iron the shirt make sure to flip it inside out.
- Ain’t nothing wrong with a few wrinkles, you love your grandparents right? Wrinkly shirts need lovin’ too.